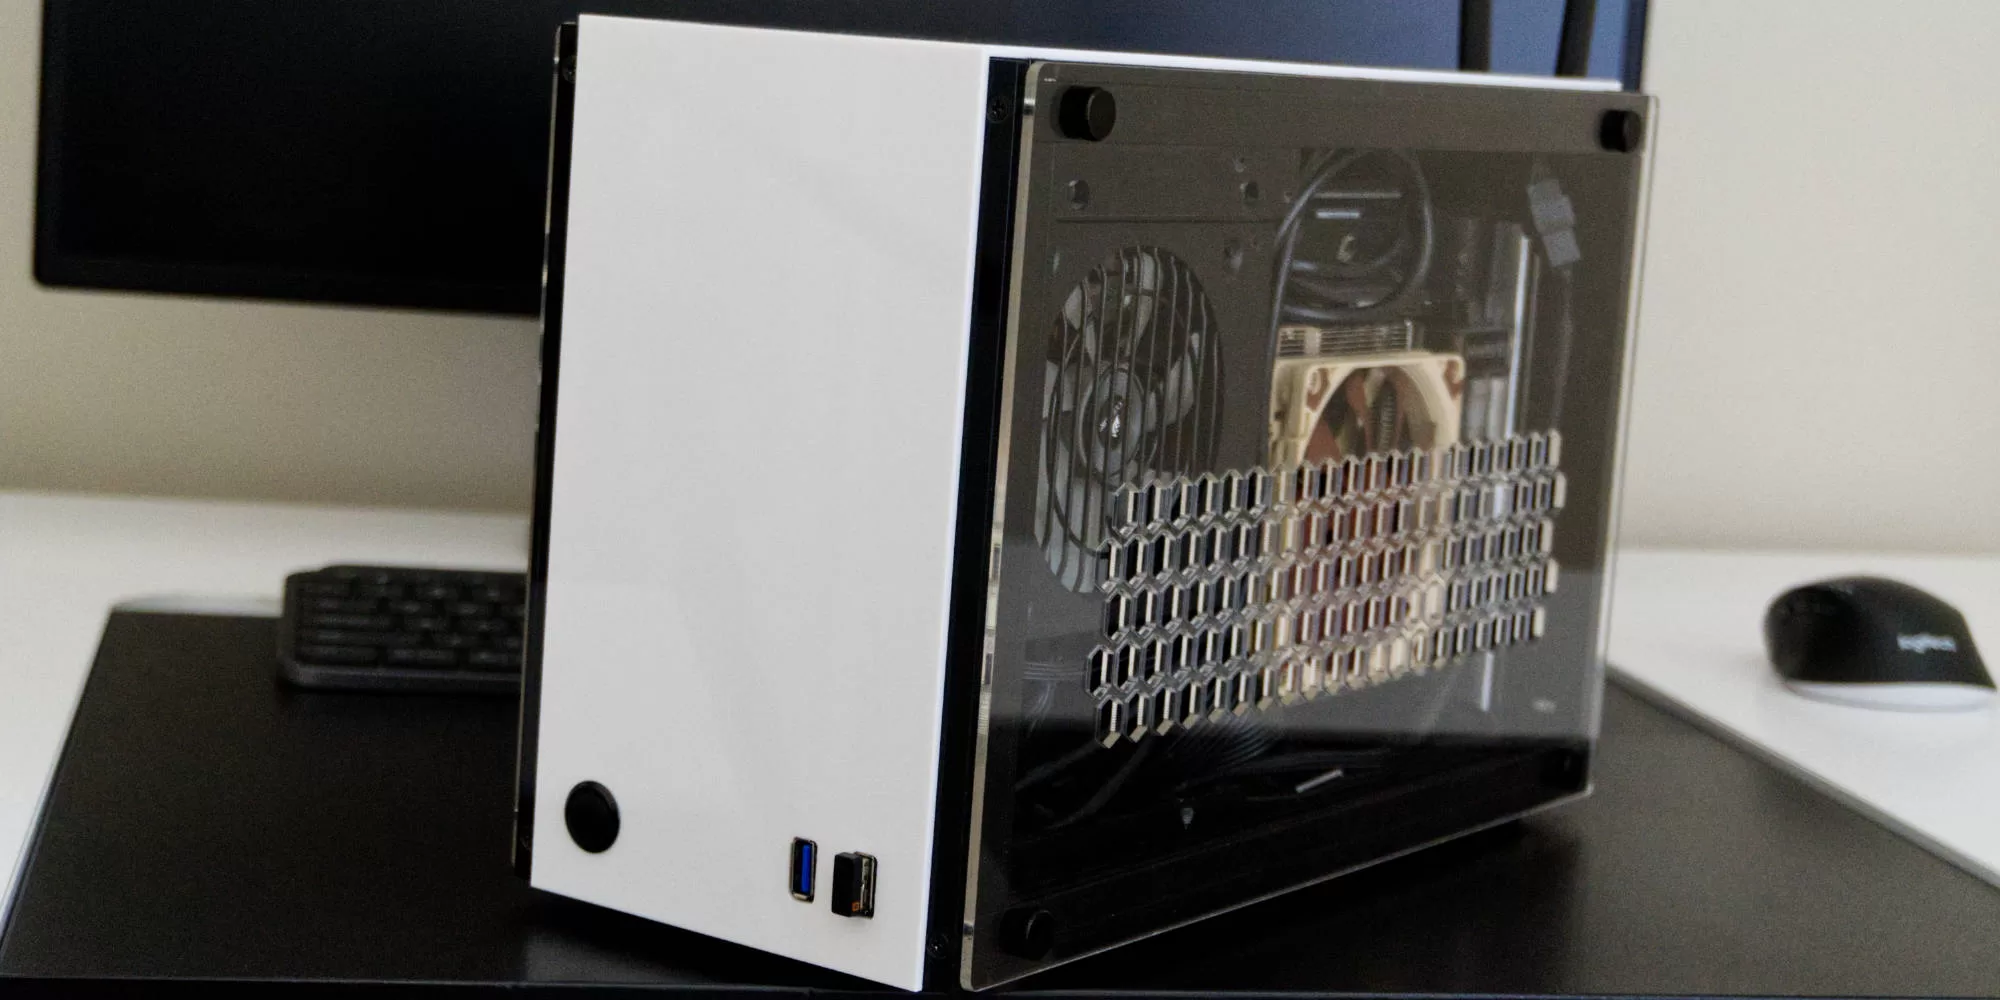
The GEEEK A50 Plus is a great budget option for small form factor cases with two USB ports on the front and a power button. It is made out of acrylic and a limited amount of metal to keep the price down, but overall is still a great case.
While looking into cases over a few weeks, I came across the GEEEK A50 PLUS, a small form factor case at a much lower price, just $69, more than half the price of other SFF cases.
From ordering the PC to it being delivered to my door, it took four days to get from Taiwan to Australia. GEEEK uses DHL to ship its cases with an additional cost of around $34. Upon arrival, I checked the case for any marks or scratches and couldn’t find any.
I partly opted for the white case because it was the only one in stock, and the fact that dust doesn’t show up on white as easily as it does on black.
Getting to know the case
The A50 PLUS from GEEEK is a Mini-ITX case, meaning it supports the Mini-ITX motherboard standard (170 mm x 170 mm) while still allowing standard-sized pc components to fit inside it, such as a graphics card and CPU cooler. The A50 PLUS comes in at 140 mm x 214 mm x 330 mm and uses a combination of acrylic and aluminum for its construction. The version 2.0 model uses acrylic for every face of the case except for the rear, which uses an aluminum plate.
The case allows for up to three 92 mm fans to be installed with the ability to add a fourth unofficially, as the GEEEK logo blocks some of the airflow. To power, the parts, and SFX or SFX-L power supply is required as the case is too small to support the standard ATX power supply.
Due to the low $69 price tag of the A50 PLUS, you must build it before putting the PC parts into it. This, along with the acrylic, keeps the price down, allowing for a more budget-friendly option in the small form factor (SFF) PC space. The case does require a PCI-E riser cable if you are using a graphics card, which ups the price by an extra $20. You do receive a power cable extension for free, however.
Building the case
Watching reviews and builds of the case online, I was able to get a feel for the case before it arrived. The most annoying part about the build had to peel off the plastic protective film on all acrylic panels. This took a few minutes per panel to get my nail under a corner but became easier after nailing the technique.
After that was out of the way, it was time to load up the instructions and get building. The instructions were actually easy to follow for a budget case, with each step laid out. However, the metal bars that run through the case requires you to place a nut into the groove and use a screw to anchor the panels, which was a little confusing at first but wasn’t too bad once I did it a few times.
Building the PC
Before you reach the end of the instructions it is suggested to add the components in as it is easier to do compared to once the case is fully together. Adding the parts it was the easiest step, in my opinion, all of the mounting holes were in the correct place, the motherboard fit into the rear IO shield without any issues and all of the cables were long enough to reach.
The components I went with were just the ones I had in my previous system with two expectations I’ll discuss a little further down. You can view the components below:
- Ryzen CPU
- Graphics card
- Motherboard
- Power supply
- Storage: Samsung M.2 SSD / Crucial M.2 SDD / Crucial 2.5″ SSD
While building, everything looked like it would fit perfectly until I got to close the side panel on the CPU side. I found that the stock cooler that came with the CPU was just a tiny bit too tall to fit and meant I had to go out and purchase the smaller but powerful NH-L9a-AM4 low profile cooler. Once I had the new cooler in, I realized that the stock cooler’s top cover could come off and would allow it to fit in the case. I ended up keeping the new cooler as the noise level is lower and is much more efficient.
The second thing I realized when building the case is the amount of hot air produced at the case’s rear top by the CPU and GPU. I found that the hot air would sit in the area and cause the processer to get hot over time. I fixed this by adding a 92 mm slim fan to the top of the case to exhaust the hot air.
Conclusion
I went into this build with two goals in mind. I wanted to build something as I craved a DIY project, and I wanted to downsize my PC to an SFF case without blowing the bank. I’d say I could hit two birds with one stone, and I am pleased with the outcome of the case and the build.
If you are looking into buying a small form factor case and don’t want to blow the budget or purchase non-standard PC parts, I would highly recommend this case. The case is often out of stock and does require you to check the store page every few days to check the stock. At the time of writing, both the white and black options are both out of stock.


