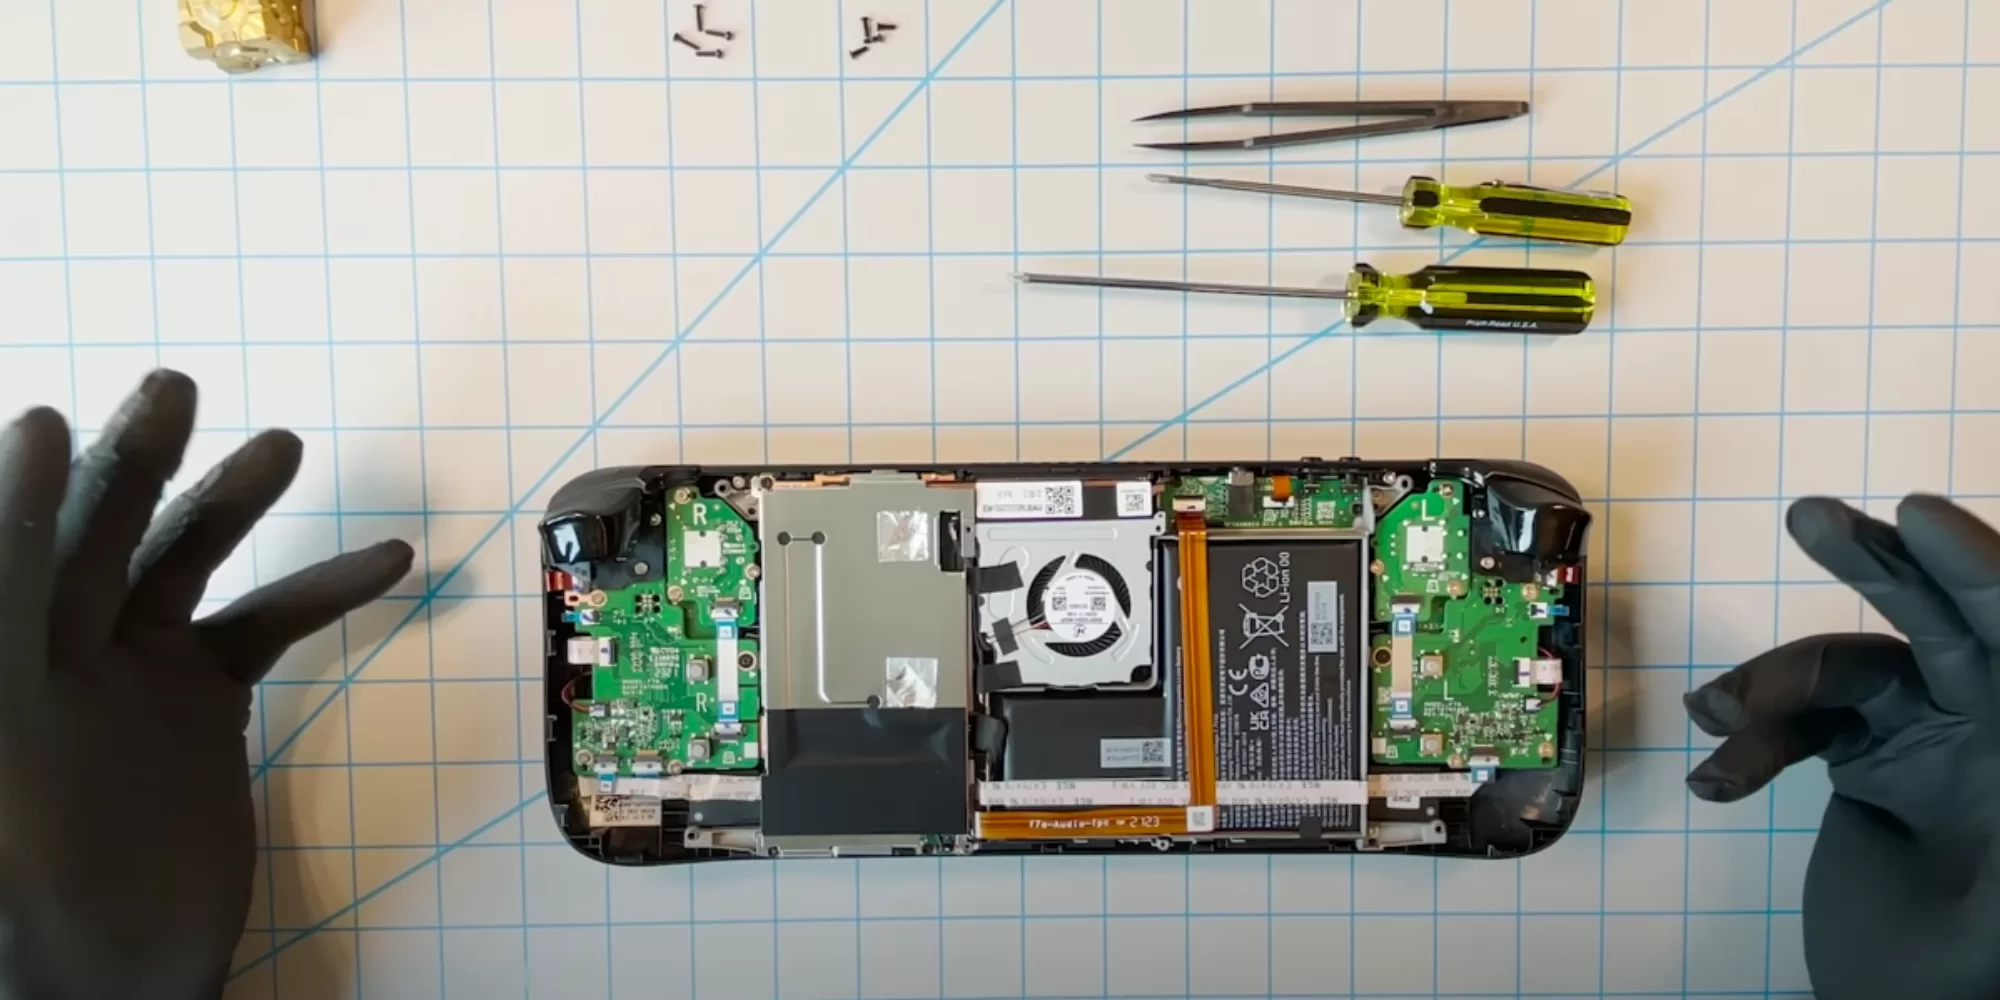
Valve, owner of Steam, has posted a teardown video of the Steam Deck showing users how to replace thumb sticks and upgrade the SSD. A win for the right to repair movement! But Valve shared the video to show you why you really shouldn’t open and fix/upgrade your Steam Deck yourself. Either way, it’s great to see a company officially releasing a video of this nature.
A look inside Steam Deck
Straight away, Valve lets you know that once you buy the Steam Deck you own it and the hardware, something that is rare these days. This is followed by a warning that opening the Steam Deck could result in damage and destruction, which is not covered by the warranty.
Moving on. It appears that you will only need two screw drivers to tear down the Steam Deck. One is used to remove four screws of the rear cover, while the other is used to remove, what looks like the screws holding the APU heatsink on. All these screws are accessible from the outside of the Steam Deck and are self-tapping as they screw directly into the plastic housing.
Valve points out that opening the case will weaken it, resulting in less structural integrity and it more likely to get damaged if dropped. Valve also recommends that you should be aware of static discharge while opening the Steam Deck.
Now that all the outer screws are removed, you can easily pry back the case and it should open with relative ease. The Steam Deck shown in the video is using pre-production hardware, so expect a bit of a difference when opening your unit up.
First step once in the Steam Deck is to unplug the battery, removing power from the device.
Replacing the thumb sticks
The thumb sticks are 100% custom, from the board, the mechanism itself, and the grip. Valve says it will have replacement parts available in the coming months. Replacing the thumb stick is as easy as removing the cable, removing three screws, taking the thumb stick assembly out, and dropping the new one in.
Upgrading the SSD
This upgrade/replacement is not recommended for the following reasons
- An off-the-shelf SSD could require more power, running the risk of damaging the Steam Deck.
- An off-the-shelf SSD could also interfere with the WIFI and Bluetooth connectivity.
- An off-the-shelf SSD could interfere with surround components depending on sizing.
- The screws used to hold down the SSD shielding also holds down the APU’s heatsink, which can alter thermal performance if not done correctly.
A list of compatible SSDs will become available in the coming months as well. Valve recommends using the MicroSD card slot to increase the storage of your Steam Deck.
Removing the SDD shield takes four screws, and you can pull the shield away. Once inside the SSD uses the normal M.2 connector, with one screw holding it down. Remove this and you’re done. Add your new SSD in and continue playing.
If you do want to upgrade or replace parts, be sure to watch the video below. We will share an update once a list of compatible SDDs is available and replacement parts can be purchased.
You might like
Source: Valve


